Step-by-step guide to Android development with Eclipse
Learn how to create applications in an Android development environment in this guide.
In this tutorial, you will learn to create a simple application of a game we all used to play when we were kids, Rock Paper Scissors. As easy as it might seem, it requires some hard work on your part before you can create an app that runs without errors. If you are reading this tutorial, it means you are probably new to the Android app development field. Don't worry -- we will divide this tutorial into different parts to make it easy for you.
Set up the Android development environment
Setting up Android development environment takes some time at first. It helps to make sure you don’t do anything wrong to save yourself from the agony of doing the whole process again.
You're required to have Windows XP or later, or Mac OS X 10.5.8 or a later version to start Android application development process. Then, there are four tools that you will need and they are available on the Internet for free:
- Java JDK5 or JDK6
- Android SDK
- Eclipse IDE for Java Developers (optional)
- Android Development Tools (ADT) Eclipse Plugin (optional)
Step 1: Setup Java Development Kit (JDK)
You can download the JDK and install it, which is pretty easy. After that, you just have to set PATH and JAVA_HOME variables to the folder where you have java and javac.
Note for Windows Users: If you installed the JDK in C:\jdk1.6.0_15 then you will have to add the following two lines in your C:\autoexec.bat file.
set PATH=C:\jdk1.6.0_15\bin;%PATH%
set JAVA_HOME=C:\jdk1.6.0_15
Step 2: Configure Android SDK
After you have successfully installed the Android SDK, it is time to configure it. After installing the Android SDK, you will get a window like this:
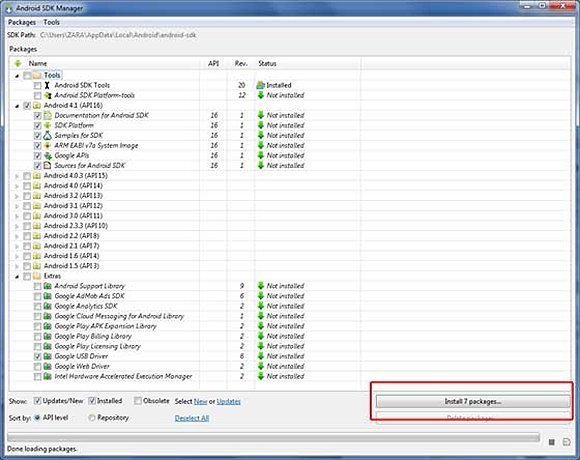
Just de-select the Documentation for Android SDK and Samples for SDK packages if you want to reduce the installation size and time. Click on Install 7 packages to continue with the installation. You will get a dialogue box like this:
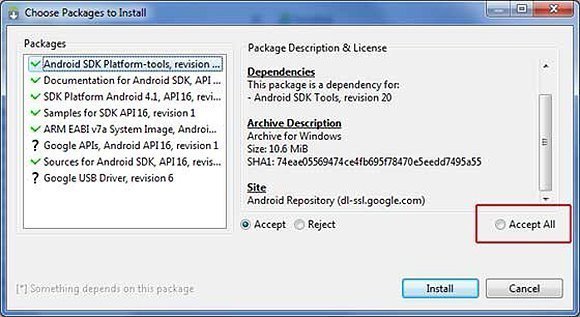
It will take some time to install, so in the meanwhile you could do some other task to kill the time. How long will it take? Well, it depends on the speed of your Internet connection. Once it is done, you can close the SDK manager.
Step 3: Setup Eclipse IDE
Install the latest version of Eclipse. After successful installation, it should display a window like this:

Step 4: Setup Android Development Tools (ADT) Plugin
Here you will learn to install the Android Development Tool plugin for Eclipse. To do this, you have to click on Help > Software Updates > Install New Software. This will display the following dialogue box.
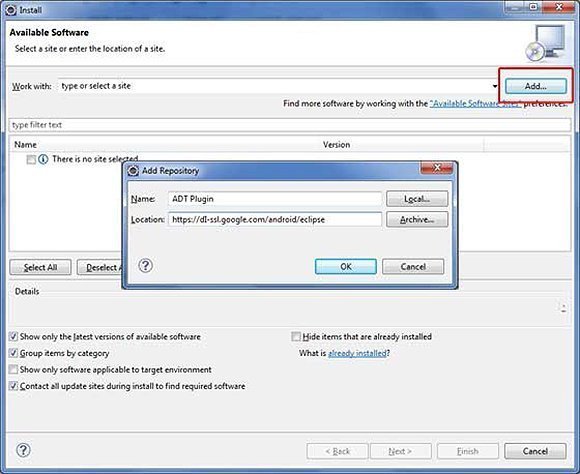
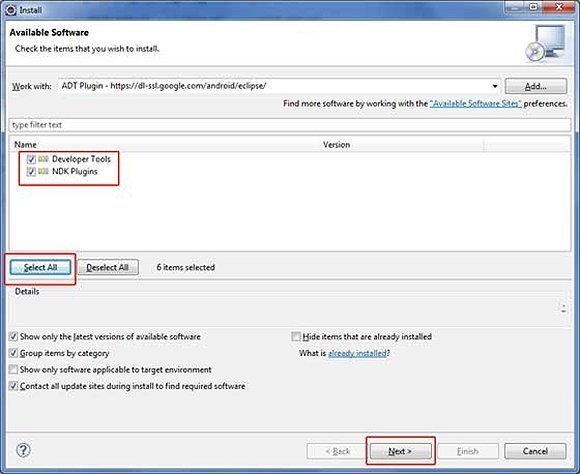
Just click on the Add button as shown in the picture and add https://dl-ssl.google.com/android/eclipse/ as the location. When you press OK, Eclipse will start to search for the required plug-in and finally it will list the found plug-ins.
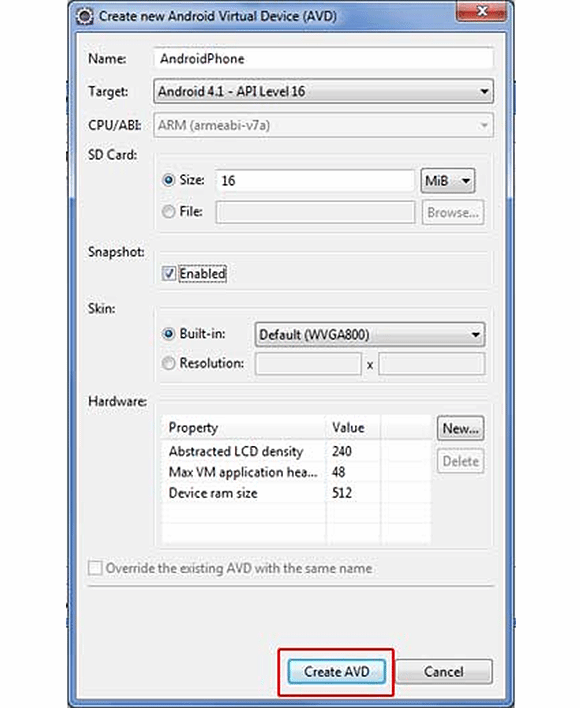
Step 5: Create Android Virtual Device
The last step is to create Android Virtual Device, which you will use to test your Android applications. To do this, open Eclipse and Launch Android AVD Manager from options Window > AVD Manager and click on New which will create a successful Android Virtual Device. Use the screenshot below to enter the correct values.
Voila! You have successfully created Android Application Development environment. You are now ready to create a simple Rock Paper Scissors Android App.
Before we write the code, you need to know how to take input from the user. The most efficient way of taking input from the user is to use the Scanner class, which is found in the java.io package as it is just a two-step process.
Scanner scanner =  new Scanner(System.in);
String input   =  scanner.next();

/* or String input   =  (new Scanner(System.in)).next(); */
I recommend using the Scanner class because it works equally well on command line as well as with Eclipse that we will use to make the Rock Paper Scissors app.
Calling the Java code in Eclipse
We will save you the trouble of writing the java code for a simple Rock Paper Scissors app and use can use the code below, but you are free to use your own code if you prefer.
// Android Rock Paper Scissors App
// Rock_Paper_Scissors
// *************

import java.util.Scanner;
import java.util.Random;


public class Rock
{
public static void main(String[] args)
{
    String personPlay; //User's play -- "R", "P", or "S"
    String computerPlay = ""; //Computer's play -- "R", "P", or "S"
    int computerInt; //Randomly generated number used to determine
                     //computer's play
    String response;


    Scanner scan = new Scanner(System.in);
    Random generator = new Random();

    System.out.println("Hey, let's play Rock, Paper, Scissors!\n" +
                       "Please enter a move.\n" + "Rock = R, Paper" +
                       "= P, and Scissors = S.");

    System.out.println();

    //Generate computer's play (0,1,2)
    computerInt = generator.nextInt(3)+1;

    //Translate computer's randomly generated play to
    //string using if //statements

    if (computerInt == 1)
       computerPlay = "R";
    else if (computerInt == 2)
       computerPlay = "P";
    else if (computerInt == 3)
       computerPlay = "S";


    //Get player's play from input-- note that this is
    // stored as a string
    System.out.println("Enter your play: ");
    personPlay = scan.next();

    //Make player's play uppercase for ease of comparison
    personPlay = personPlay.toUpperCase();

    //Print computer's play
    System.out.println("Computer play is: " + computerPlay);


    //See who won. Use nested ifs

    if (personPlay.equals(computerPlay))
       System.out.println("It's a tie!");
    else if (personPlay.equals("R"))
       if (computerPlay.equals("S"))
          System.out.println("Rock crushes scissors. You win!!");
    else if (computerPlay.equals("P"))
            System.out.println("Paper eats rock. You lose!!");
    else if (personPlay.equals("P"))
       if (computerPlay.equals("S"))
       System.out.println("Scissor cuts paper. You lose!!");
    else if (computerPlay.equals("R"))
            System.out.println("Paper eats rock. You win!!");
    else if (personPlay.equals("S"))
         if (computerPlay.equals("P"))
         System.out.println("Scissor cuts paper. You win!!");
    else if (computerPlay.equals("R"))
            System.out.println("Rock breaks scissors. You lose!!");
    else
         System.out.println("Invalid user input.");
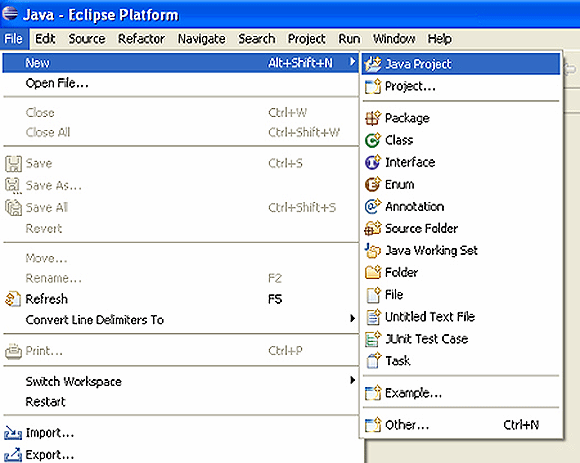
Now calling the Java code in Eclipse is a tricky process and it helps to pay attention while you're doing this. Launch Eclipse and click File > New > Java Project
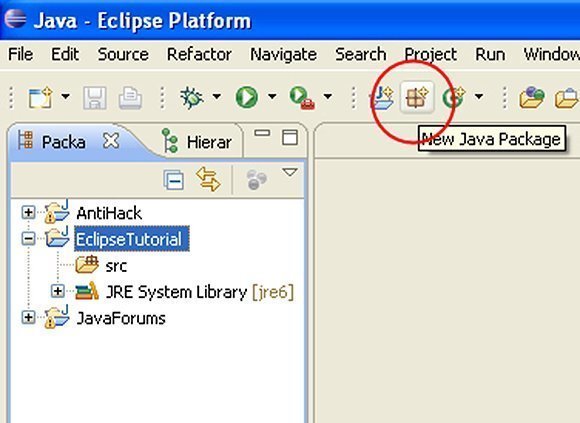
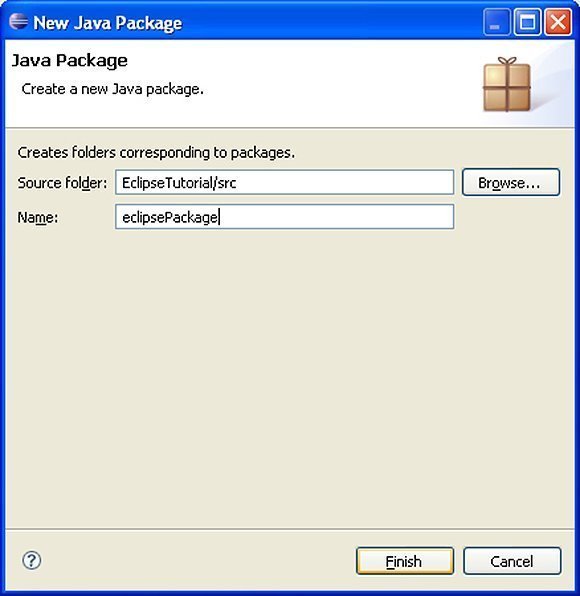
When the Create a Java Project box appears, it's time to give your project a name. Click on Finish to save it and it should appear in the Package Explorer window. Then we are supposed to add a package which will contain all our package files. Click on New Java Package icon to do this, as shown in the screenshot below.
Name your project and then click Finish.
Now we need to add a Java Class, which is as easy as adding a Java Package.

After giving it a name, make sure that the following options are checked:
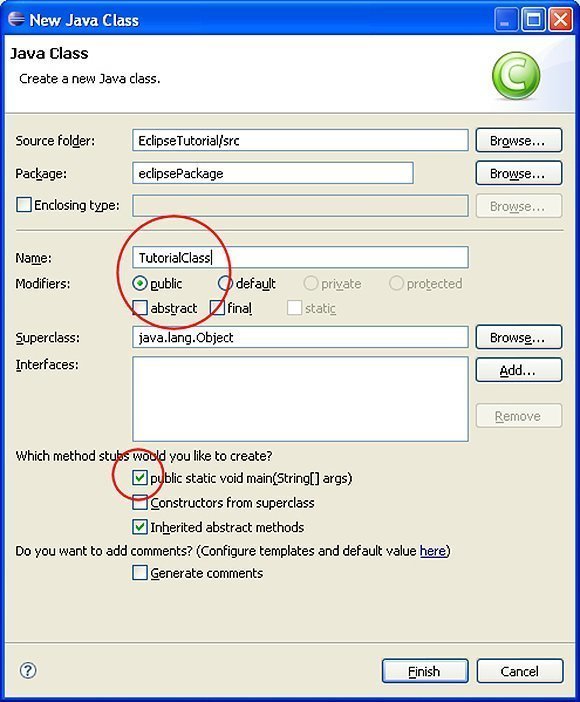
After you create a new class, it will show up in the Work Space where you can write or copy the code.
Congratulations! You have just finished writing your first Java Application in Eclipse. It wasn’t that difficult was it?
Now you need to build the application and to do this, Right Click on your Android Project and select Android Tools->Export Signed Application Package. After selecting the export button, select Create new keystore and it will take you to the location where you want to save it, so give it a name and save it. Fill in all the required fields that are self-explanatory and save it. You have successfully exported the apk file to your computer and you can test the app it on your android device.
Testing
Testing is as important as developing the app because your app will be of no use if it doesn't run properly or shows errors. Luckily, there is an integrated testing framework in Android Framework, which you can use to test all the aspects of your application. SDK tools can also help set up and test applications. SDK will help you test different aspects of your app no matter if you are planning on running your tests within an emulator or any Android device.
I will recommend using ADT for the testing process, as it is comparatively easier than the other tools. Using ADT, you can easily create a test project and link it to the application under test. The great thing about the ADT is that it automatically adds the necessary <instrumentation> element in the test package's manifest file.
To create a test project in Eclipse with ADT
Launch Eclipse from the Start Menu and click on File > New > Other and from the drop-down menu, click on Android Test Project, then at the bottom of the dialog click Next. Enter any name you want and in the Test Target panel, set An Existing Android Project and browse to the Rock Paper Scissors app you made. Now you should be able to see the wizard completing the Test Target Package, Application Name, and Package Name fields for you.
Choose the Android SDK platform from the Build Target Panel that the application to be tested is using. Click the Finish button to complete the Wizard and if it is disabled, look for error messages at the top to fix any problems.
If you are looking for a step-by-step guide to Android testing, you will find this Activity Testing Tutorial very useful.


