

Modern browsers make asynchronous file uploads possible with built-in web APIs. You do not need jQuery, Dojo or another JavaScript library. A file input, FormData and fetch() are enough on the client side.
This example uses PHP for the server-side upload handler, but the browser code is independent of PHP. The same JavaScript can send the multipart request to a Java servlet, Spring application, Node.js service or another HTTP endpoint that accepts file uploads.
The easiest and simplest way for a developer to accomplish an Ajax file upload is to use pure JavaScript and leave the bulky libraries and frameworks behind.
Ajax file uploads
A developer can perform an Ajax-based file upload to a server with JavaScript in five steps:
- Add a file input to the page.
- Use JavaScript to place the selected file in a
FormDataobject. - Send the multipart request asynchronously with
fetch(). - Have a server endpoint validate and process the uploaded file.
- Check the HTTP response before reporting success to the user.
In this example, the JavaScript file upload target is an Apache Web Server. As a result, the server-side component that handles the Ajax request will be written in PHP. If a Tomcat or Jetty server was the upload target, a developer could code a Java based uploader on the server-side.
HTML5 file tags
HTML5 introduced a new type of input form field named file. When a browser encounters this tag, it renders a fully functional file picker on the web page. When it’s combined with an HTML5 button tag that can trigger a JavaScript method, these two elements represent the required markup elements to begin the JavaScript and Ajax file upload process.
The following HTML5 tags provide the required components to add a file selector and an upload button to any web page:
<input id="fileupload" type="file" name="file">

<button id="upload-button" type="button">
  Upload
</button>

<p id="upload-status" aria-live="polite"></p>
The JavaScript registers a click handler for the button and calls uploadFile(). Keeping JavaScript out of the HTML onclick attribute makes the markup cleaner and separates behavior from structure.
async function uploadFile() {
  const fileInput = document.getElementById("fileupload");
  const status = document.getElementById("upload-status");
  const file = fileInput.files[0];

  if (!file) {
    status.textContent = "Choose a file first.";
    return;
  }

  const formData = new FormData();
  formData.append("file", file);

  try {
    const response = await fetch("/upload.php", {
      method: "POST",
      body: formData
    });

    if (!response.ok) {
      throw new Error(`Upload failed with status ${response.status}`);
    }

    status.textContent = "The file uploaded successfully.";
  } catch (error) {
    status.textContent = "The file could not be uploaded.";
    console.error(error);
  }
}

document
  .getElementById("upload-button")
  .addEventListener("click", uploadFile);
JavaScript file upload logic
The upload logic performs four important tasks:
- Verify that the user selected a file.
- Add the file to a
FormDataobject. - POST the multipart request with
fetch(). - Check
response.okbefore reporting success.
Do not manually set the Content-Type header when sending FormData. The browser generates the correct multipart/form-data header and boundary.
All the HTML and JavaScript logic will be contained in a single file named uploader.html. The complete HTML looks as follows:
<!DOCTYPE html>
<html lang="en">
<head>
  <meta charset="UTF-8">
  <title>Ajax JavaScript File Upload Example</title>
</head>
<body>
  <input id="fileupload" type="file" name="file">
  <button id="upload-button" type="button">Upload</button>
  <p id="upload-status" aria-live="polite"></p>

  <script>
    async function uploadFile() {
      const fileInput = document.getElementById("fileupload");
      const status = document.getElementById("upload-status");
      const file = fileInput.files[0];

      if (!file) {
        status.textContent = "Choose a file first.";
        return;
      }

      const formData = new FormData();
      formData.append("file", file);

      try {
        const response = await fetch("/upload.php", {
          method: "POST",
          body: formData
        });

        if (!response.ok) {
          throw new Error(`Upload failed: ${response.status}`);
        }

        status.textContent = "The file uploaded successfully.";
      } catch (error) {
        status.textContent = "The file could not be uploaded.";
        console.error(error);
      }
    }

    document
      .getElementById("upload-button")
      .addEventListener("click", uploadFile);
  </script>
</body>
</html>
PHP file upload processing
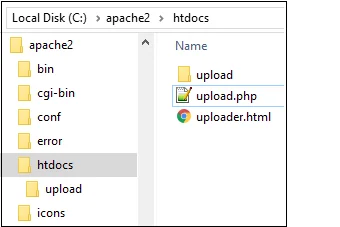
Required JavaScript file upload components.
A server-side endpoint must validate and process the incoming upload. Apache HTTP Server can run PHP when PHP is installed and configured, but PHP is not inherent to Apache. In this example, upload.php receives the multipart request and stores an accepted file in an upload directory.
<?php

$uploadDir = __DIR__ . "/upload/";

if (!isset($_FILES["file"]) ||
    $_FILES["file"]["error"] !== UPLOAD_ERR_OK) {
    http_response_code(400);
    exit("No valid file was uploaded.");
}

$originalName = basename($_FILES["file"]["name"]);
$destination = $uploadDir . $originalName;

if (!move_uploaded_file(
    $_FILES["file"]["tmp_name"],
    $destination
)) {
    http_response_code(500);
    exit("The upload could not be saved.");
}

echo "Success";
The PHP example checks PHP's upload error code, strips directory components from the submitted filename with basename() and then calls move_uploaded_file(). The upload directory must already exist and be writable by the PHP process.
This is still a learning example, not a complete production upload service. A production endpoint should enforce an upload-size limit, allow only expected file types, generate server-controlled filenames, prevent executable content from being served from the upload directory, authenticate users when appropriate and consider malware scanning.
Run the JavaScript file upload example
For a basic local Apache/PHP setup, place the example files under the configured document root and create the writable upload directory. When a client accesses the uploader.html file through a browser, the client will be able to upload a file to the server using Ajax and pure JavaScript.
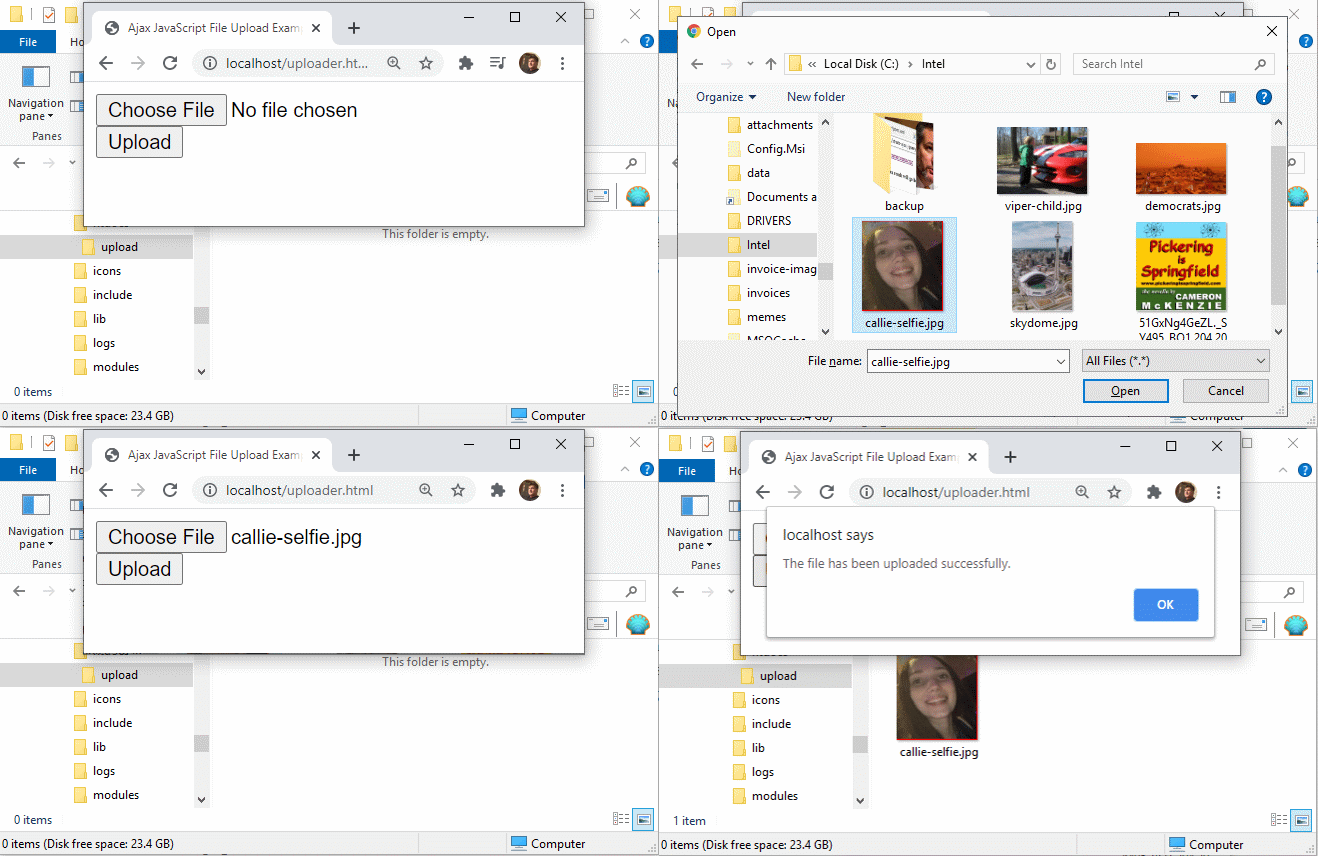
A pure JavaScript file uploader simplifies Ajax based interactions with the server.