

How do I use the git stash pop command?
The git stash pop command restores the most recently stashed changes to your working directory and, when the operation succeeds cleanly, removes that stash entry from the stash list.
The basic syntax is simple:
git stash popHowever, you must first add items to Git’s stash to pop your shelved changes out of it. That’s exactly what we will show you how to do next.
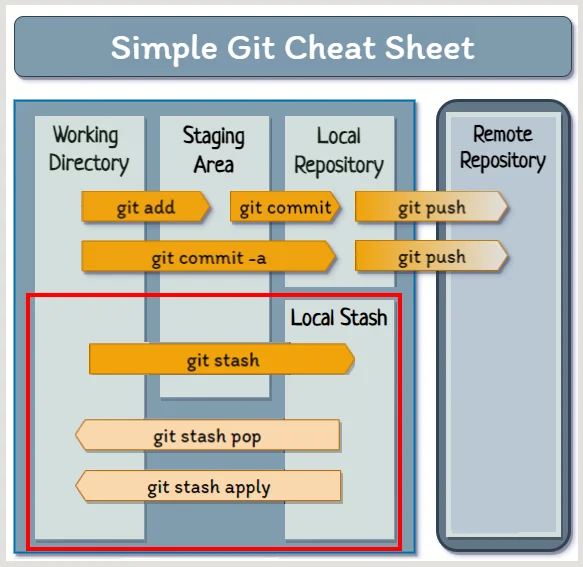
The git stash allows developers to shelve changes and pop them back later.
Why would you use the git stash?
Sometimes a developer updates a file or makes changes that are not ready for a commit to be shared with the rest of the team. At the same time, the developer must perform a commit or a reset to perform other work, such as the following:
- Switch between branches.
- Fetch or pull new code from GitHub or GitLab.
- Cherry-pick from another branch.
- Immediately fix a bug.
With the git stash command, a developer can move onto other work that would normally require an empty Git index and a clean working directory, while not lose recent changes or updates made since the last Git commit.
| Post SSH Key Generation Tasks |
|---|
| After you’ve run the ssh keygen command, you’ll need to push, pull and clone with Git. Here are some quick tutorials to show you how:
|
How do you shelve changes in Git?
To temporarily shelve changes to tracked files, including staged changes, run git stash push:
git stash push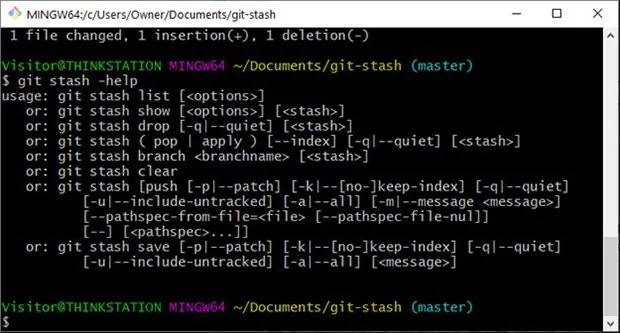
The git stash pop and git stash apply commands are considered part of the Git porcelain.
How to name a Git stash
If you accumulate several stash entries, adding a message makes them much easier to identify later.
Add a message with -m or --message:
git stash push --message "Git stash pop tutorial"How do you stash untracked files?
By default, git stash push does not include untracked files. To stash them too, add -u or --include-untracked:
git stash push --include-untrackedAfter the git stash push command completes, your workspace resets back to the way it was when the last Git commit was created.
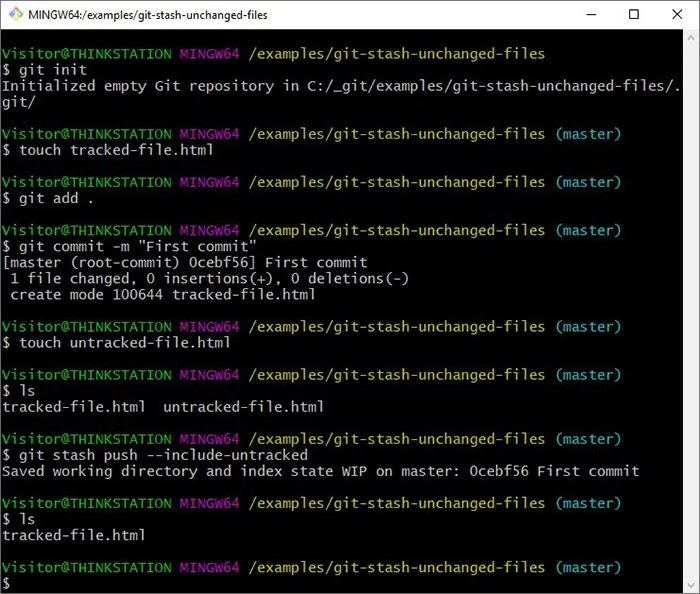
You must use the -u switch to add untracked files to Git stash.
How do you use the git stash pop command?
After a developer moves their changes into the stash, they are free to push, pull, fetch, revert and cherry-pick all they want. When they want the shelved changes back, they just issue the git stash pop command:
git stash popGit reapplies the stashed changes to the working tree. If the pop succeeds cleanly, Git also removes that stash entry from the stash list.
git stash pop example
The best way to learn commands such as git stash pop is to actually use them.
The nine commands below provide a start-to-finish git stash pop example that accomplish the following tasks:
- Create a Git repository.
- Add files and commits.
- Update a tracked file.
- Stash the update.
- Perform further changes and commits.
- Pull the shelved changes back with a git stash pop.
Give these commands a try to really learn how the git stash pop command works:
git init
echo "Git stash pop command." >> example.txt
git add .
git commit -m "First git stash pop example commit"

echo "Updated git stash pop tutorial." >> example.txt
git stash push -m "Work in progress"

rm example.txt
git commit -am "Update the stash pop example file"

git stash pop
How do you handle git stash conflicts?
It’s possible to encounter a conflict if a file you move from the stash into your working directory has been updated and made part of a commit since the stash to pop was originally created.
To resolve a git stash merge conflict, do the following:
- Find and open the file in conflict.
- Update the file to rectify the conflicting changes.
- Add the updated file to the index.
- Perform a commit.
After the commit occurs, the git stash conflict will resolve and you can resume performing normal Git operations.
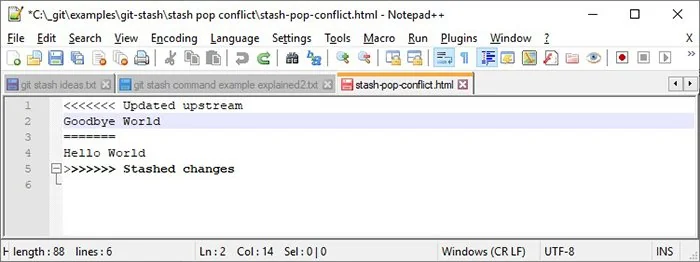
To resolve a git stash pop conflict, just update the file in conflict and then perform a commit.
What’s the difference between git stash pop and apply?
There are actually two ways to move changes from the stash into your working directory:
- git stash pop
- git stash apply
The key difference is cleanup behavior. git stash apply reapplies a stash but keeps the stash entry. git stash pop reapplies it and, when successful, removes that entry.
Furthermore, since the git stash pop command deletes the topmost stash when done, the ordering of all the stashes in your stash history is updated accordingly.
Use apply when you want to keep the stash available for reuse. Use pop when you are finished with the stash and want Git to remove it after a successful restore.
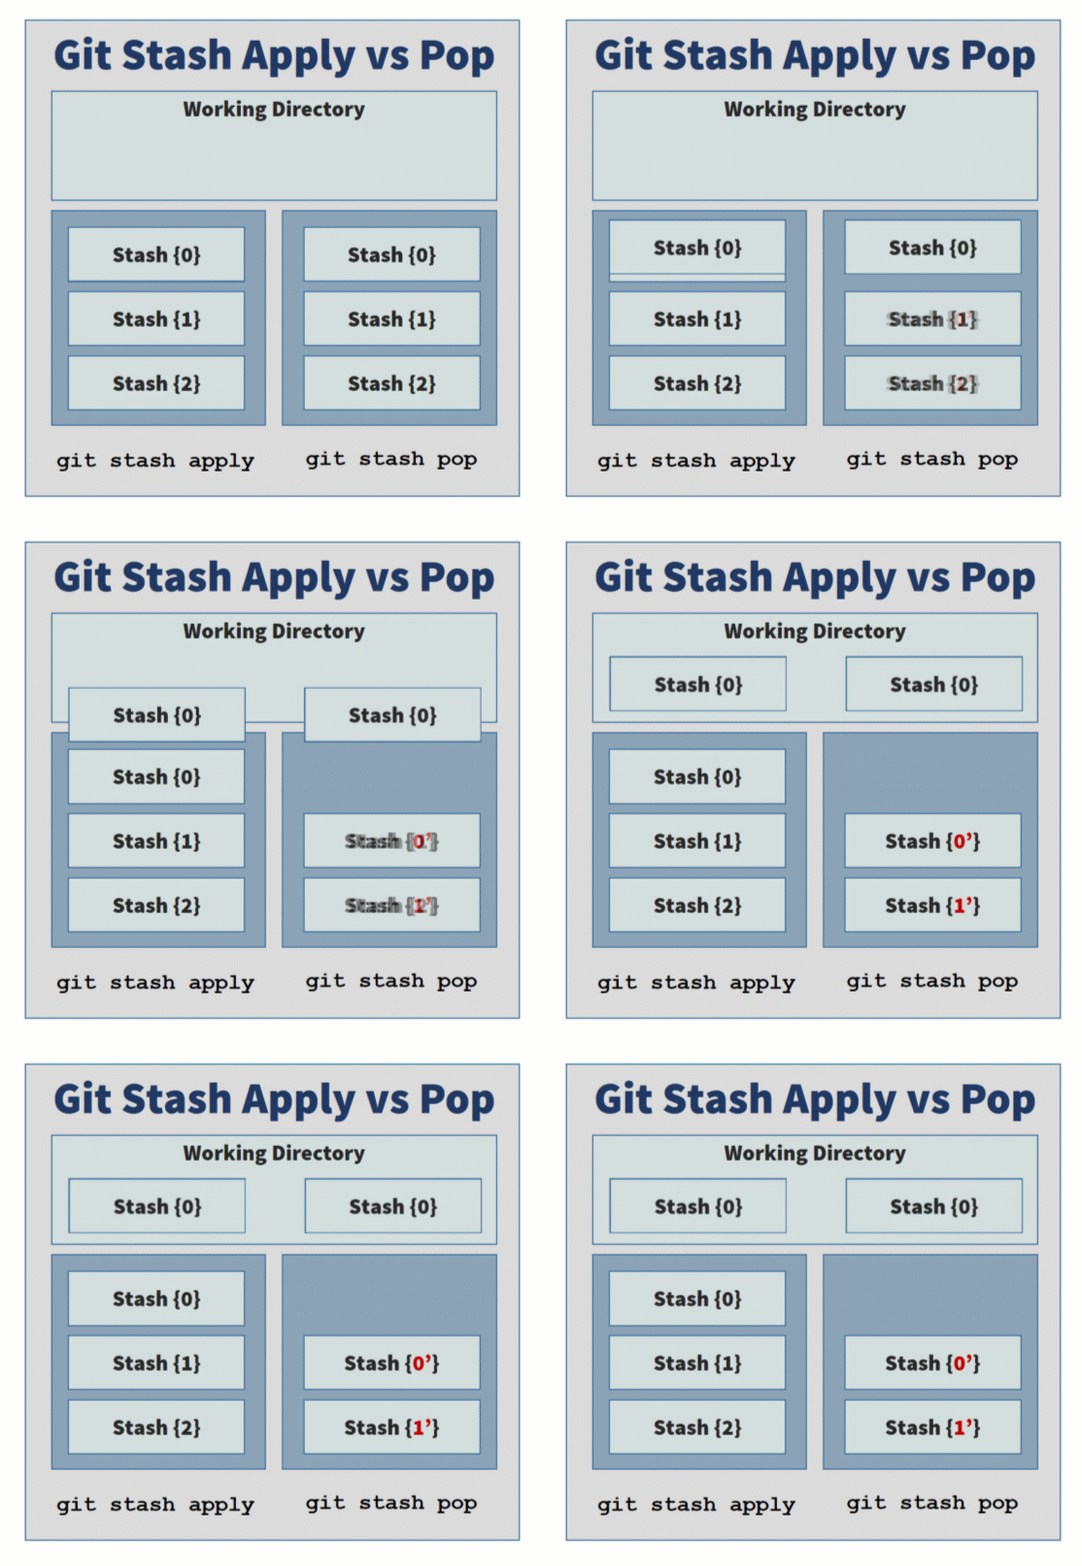
Git stash pop removes items from the stash history, while git stash apply does not.
How git stash and pop work together
When you need to temporarily shelve changes but know you’ll return to them sometime in the near future, Git’s stash feature is a godsend.
And when you want to bring those shelved changes back into your development workspace, that’s what the git stash pop command is for.

Cameron McKenzie is an AWS Certified AI Practitioner, Machine Learning Engineer, Solutions Architect and author of many popular books in the software development and Cloud Computing space. His growing YouTube channel training devs in Java, Spring, AI and ML has well over 30,000 subscribers.