
imageteam - Fotolia
An Apache Commons FileUpload example and the HttpClient
In this article you will have a look at the capabilities of the HttpClient component and also some hands-on examples.

The enterprise Java community has made great strides to simplify file uploads from a web browser to a server. What was once a task that involved many cross-platform complications is now straightforward, and developers can choose from a multitude of options.
In this example, we will compare the built-in, multipart form handling capabilities of the standard Jakarta Servlet API with the facilities provided through the Apache Commons FileUpload library.
Multipart file uploads
All Java-based file uploads start on the client, either through an HTML form, a JavaScript method or the Apache Commons HttpClient. The simplest of the three is the HTML form.
When developers add the multipart/form-data attribute to the form tag and includes an input tag with the type attribute set to file, their web browser will present a folder navigator that will allow them to upload any local file.
The action attribute of the form -- which in this case is set to fileuploadservlet -- identifies the server-side component responsible to handle the uploaded file and saves it to the server's file system.
<!DOCTYPE html>
<html>
<head>
<title> Apache Commons File Upload Example </title>
</head>
<body>

<form method="post" action="fileuploadservlet" enctype="multipart/form-data">
<input type="file" name="file" />
<input type="submit" value="Upload" />
</form>

</body>
</html>
The simplest approach a developer can take to handle a file upload is to use the Servlet 3.0 Part class, which can process a multipart form element and allow a file to be incrementally saved until it completes the file upload. Here is the code required to have a Servlet perform a file upload in Java:
package com.mcnz.web;
import java.io.*;
import javax.servlet.*;
import javax.servlet.http.*;
import javax.servlet.annotation.*;


@WebServlet(name = "FileUploadServlet", urlPatterns = { "/fileuploadservlet" })
@MultipartConfig(
  fileSizeThreshold = 1024 * 1024 * 1, // 1 MB
  maxFileSize = 1024 * 1024 * 10,      // 10 MB
  maxRequestSize = 1024 * 1024 * 100   // 100 MB
)
/* Simple Java File Upload Example */
public class FileUploadServlet extends HttpServlet {

  public void doPost(HttpServletRequest request, HttpServletResponse response) throws ServletException, IOException {

    /* For comparison of Servlet and Apache Commons File Upload APIs */
    Part filePart = request.getPart("file");
    String fileName = filePart.getSubmittedFileName();
    for (Part part : request.getParts()) {
      part.write("C:\\upload\\" + fileName);
    }
    response.getWriter().print("Sucessfully Java file upload.");
  }

}
Apache FileUpload Maven coordinates
The Apache Commons FileUpload library provides developers a compelling alternative for projects that aren't updated to the Servlet 3.0 release, or if they want some extended functionality beyond the Java Servlet file upload capabilities. The following Maven coordinates will add Apache Commons FileUpload capabilities to any project, regardless of which Servlet API version the developer uses:
<dependency>
   <groupId>commons-fileupload</groupId>
   <artifactId>commons-fileupload</artifactId>
   <version>1.4</version>
</dependency>
With our project linked to the Apache Commons FileUpload library through the Maven POM file, we could rewrite the doPost method of our Servlet as follows:
protected void doPost(HttpServletRequest request, HttpServletResponse response) throws ServletException, IOException {
  /* Apache Commons file upload example in Java */
  try {

    DiskFileItemFactory factory = new DiskFileItemFactory();
    factory.setRepository(new File("C:\\temp\\"));
	ServletFileUpload fileUpload = new ServletFileUpload(factory);
	List<FileItem> fileItems = fileUpload.parseRequest(request);
	for(FileItem fileItem : fileItems) {
	  if(!fileItem.isFormField()) {
	    File file = new File(fileItem.getName());
		File fNew= new File("C:\\upload\\"  + file.getName());
		fileItem.write(fNew);
	  }
	}
  } catch (Exception e) {
    String fileUploadError = "Problem with Apache Commons File Upload.";
    System.out.println(fileUploadError);
  }
}
Servlet vs. Apache Commons FileUpload
There are a couple of noteworthy features included with Apache Commons FileUpload compared to the Servlet-based counterpart.
First, a developer can configure temporary file upload location through the DiskFileItemFactory class.
And second, the ServletFileUpload class returns a list of uploaded files, rather than just one. As a result, the Apache Commons FileUpload will work with multiple files, not just one.
An HTML page like the one below -- which contains three file upload buttons -- would work with this iteration of the doPost method just as effectively as the one shown earlier:
<!DOCTYPE html>
<html>
<head>
<title> Java File Upload Servlet Example </title>
</head>
<body>

  <form method="post" action="fileuploadservlet" enctype="multipart/form-data">
    <input type="file" name="file1" />
	<input type="file" name="file2" />
	<input type="file" name="file3" />
    <input type="submit" value="Upload" />
  </form>

</body>
</html>
If developers maintain an older Apache Commons upload code, they may see a class named DiskFileUpload used to initiate file upload processing. However, the DiskFileUpload class is now deprecated, and it is recommended that developers instead use the DiskFileItemFactory and the ServletFileUpload classes.
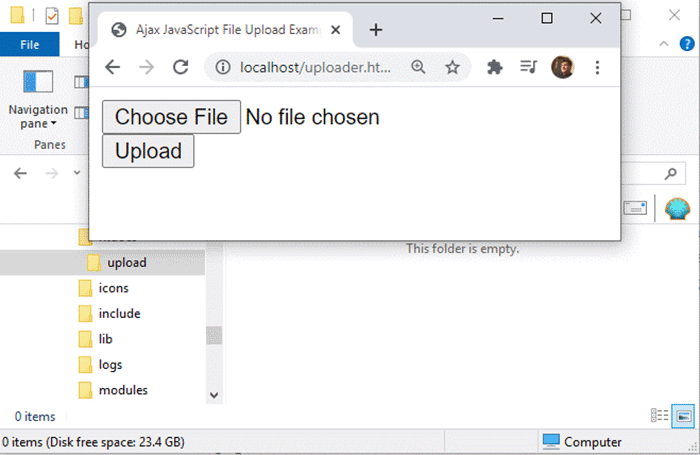
Ajax-based file uploads
An HTML form is the simplest way to demonstrate how the Apache Commons FileUpload works. However, developers that work with AngularJS or even pure JavaScript generally prefer to invoke the Java file upload process through an Ajax-based JavaScript call. Such an enhancement requires no change to the server-side file upload component, but instead, just a small change to the HTML code rendered by the browser.
The following HTML file will trigger an Ajax-based Apache Commons file upload:
<!DOCTYPE html>
<html>
 <head>
  <title>Apache Commons File Uploader and Ajax</title>
 </head>
 <body>
  <!-- HTML5 Input Form Elements -->
  <input id="fileupload" type="file" name="fileupload" />
  <button id="upload-button" onclick="uploadFile()"> Upload </button>

  <!-- Ajax JavaScript File Upload Logic -->
  <script>
  async function uploadFile() {
  let formData = new FormData();
  formData.append("file", fileupload.files[0]);
  await fetch('/fileuploadservlet', {
    method: "POST",
    body: formData
  });
  alert('The file has been uploaded successfully.');
  }
  </script>

 </body>
</html>
Apache HttpClient and FileUpload classes
Developers can also use the Apache Commons HttpClient class for even more control over how they invoke the FileUploadServlet.
There are a variety of scenarios where it is better to invoke a Servlet or RESTful API though the Apache HttpClient class than with an HTML form or JavaScript. For example, when a developer codes a test class that's triggered by a Java-based Jenkins build, it requires a lot of time to script HTML and JavaScript-based resources. The Apache Commons HttpClient class allows Java developers to invoke and test their web-based applications without any need for HTML, JavaScript or a web browser.
The following class uses the Apache Commons HttpClient to upload files to a Java web server where a resource named fileuploadservlet is configured to process the files:
package com.mcnz.web;

import java.io.*;
import org.apache.commons.httpclient.*;
import org.apache.commons.httpclient.methods.*;
import org.apache.commons.httpclient.methods.multipart.*;

/* HttpClient file uploads with Apache Commons */
public class HttpMultiPartFileUpload {
  private static String url =
"http://localhost:8080/apache-commons-file-upload/fileuploadservlet";

  public static void main(String[] args) throws IOException {
    File file1 = new File("C:\\_tools\\students.xml");
    File file2 = new File("C:\\_tools\\rules.xml");

    PostMethod filePost = new PostMethod(url);
    Part[] parts = {
      new FilePart(file1.getName(), file1),
      new FilePart(file2.getName(), file2)
    };
    filePost.setRequestEntity(
      new MultipartRequestEntity(parts, filePost.getParams())
    );
    HttpClient client = new HttpClient();
    int status = client.executeMethod(filePost);
    System.out.println(status);
  }
}
Developers who maintain older Apache Commons HttpClient upload code may notice the MultipartPostMethod component in use. This MultipartPostMethod class is now deprecated, and the MultipartRequestEntity and the PostMethod classes replace this previous functionality.
How to use Apache Commons FileUpload classes
In review, the basic steps to upload files with the Apache Commons FileUpload library are:
- Create an HTML form that uses HTML 5 multipart file upload semantics.
- Create a servlet to handle the incoming file upload.
- Set a temp storage directory with the DiskFileItemFactory class.
- Use the ServletFileUpload to get a reference to uploaded fileSizeThreshold.
- Save each file upload to the server with the Apache Commons FileItem's write() method.
There are a variety of options for Java developers to use for file uploads, such as writing PHP upload scripts, or using APIs from popular frameworks like Spring Boot or Struts 2.5. The standard approach since the version 3.0 release is to use the file upload facilities built into the Servlet API.
But for developers who still maintain older code bases -- or perhaps for projects that need the extended functionality it provides -- the Apache Commons FileUpload library is an effective and reliable way to move files from the client to the server.