How to install JDK 8 and write the Java Hello World application
In this tutorial, we look at how to set up a basic Java SE development environment by installing JDK 8, after which we write, compile and run the Java Hello World application.

Any JVM is capable of running byte-code, so any computer that has a JVM installed is capable of running Java programs. That's what makes Java cross-platform.
One of the biggest up-front challenges in learning a new programming language is getting the environment up and running. In this tutorial, we take you through the steps involved in installing JDK 8, confirming the veracity of the installation by writing the requisite Hello World application in Java, and compiling and running that application on the Java Virtual Machine. When the code is successfully run, you can rest assured that the environment is installed and configured correctly, making you ready to engage in more elaborate software development challenges.
Writing Java-based applications requires a bit of up-front installation and configuration. In order for Java programs to run, source code needs to be compiled into Java bytecode, which contains the low-level instructions understood by the Java virtual machine. Any JVM is capable of running bytecode, so any computer that has a JVM installed is capable of running Java programs. That's what makes Java cross-platform. "Write once, run anywhere," or WORA, as it is often abbreviated, is one of the key reasons Java has become such a popular programming language.
Downloading the JDK from Oracle
To acquire the tools that allow you to compile source code, package Java applications in Java archives (JAR files) and acquire a JVM on which your Java programs can run, you need to download and install the Java development toolkit from Oracle. The JDK has many flavors, including a micro edition and an enterprise development edition, but for learning Java, the right one to download and install is the standard edition: Java SE (Figure 1).
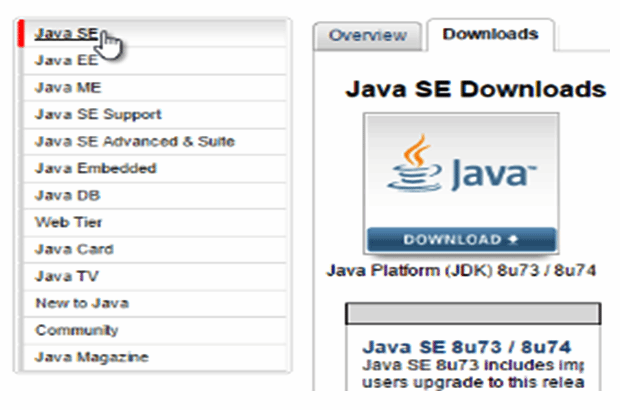
Figure 1. Downloading the Java SE version of the JDK.
The installer is relatively straightforward to use. The only customization performed in this Java Hello World tutorial is to install the JDK into the C:\_jdk1.8 directory (Figure 2). All other options can remain in their default state.
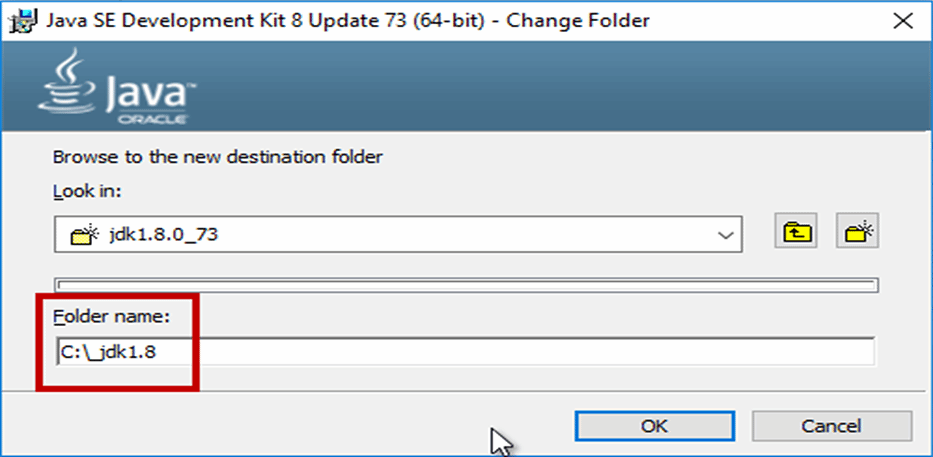
Figure 2. Choosing a custom installation directory for the JDK.
After installation, it's customary to set the JAVA_HOME environment variable to point to the installation directory (Figure 3). This allows other programs that require a JVM to find the JVM. It also helps to identify the JVM installation of choice if multiple versions have been installed on a given machine.
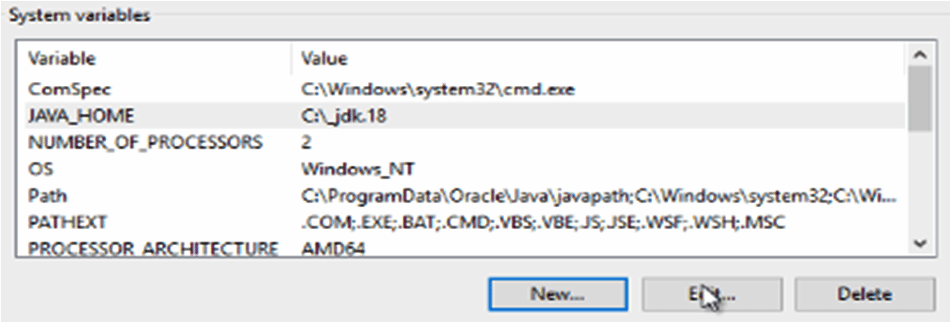
Figure 3. Configuring the JAVA_HOME system variable.
With Java SE installed, you need to code, compile and run the customary Hello World application. Doing so will not only confirm the veracity of the installation, but also provide an opportunity to use the tools provided by the JDK that allow you to compile and run code.
The Java HelloWorld application
Write the following code into any standard text editor, keeping in mind that Java is case sensitive, so you need to be careful of which letters are uppercase and which letters are lowercase.
public class HelloWorld {
	public static void main(String args[]) {
		System.out.println("Hello World");
	}
}
You need to save the code in the bin directory of the JDK, using the file name HelloWorld.java. The name of the file must match the name of the class exactly, and everything is case sensitive to the JDK, so ensure the "H" and "W" are uppercase letters both in the name of the HelloWorld.java file, and in the name given to the class within the source code.
Compiling and running code
The file is saved to the bin directory because the javac.exe tool used to compile source code and the java.exe tool used to run code are located there. To compile the source code into bytecode, open a command prompt, navigate to the bin directory of the JDK installation and run the following command:
> javac HelloWorld.java
This will create a new file in the bin directory named HelloWorld.class, which is the bytecode embodiment of the source code. To run the HelloWorld.class file, run the following command in the bin directory:
> java HelloWorld
When you run the bytecode, the words "Hello World" output to the console (Figure 4), demonstrating that your Java SE installation is working.
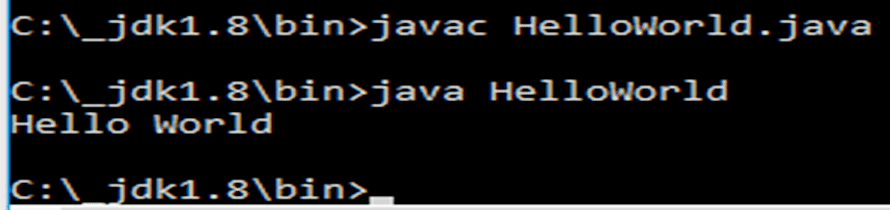
Figure 4. Compiling Java source code and executing bytecode.
When the Java Hello World application runs and prints the text "Hello World" to the console, the mission is accomplished and you have installed and configured the JDK successfully. You also have verified the installation's ability to compile and execute Java source code.
Is cross-platform compatibility still a compelling reason to adopt Java as a development platform? Let us know.
Next Steps:
Java 7 tutorial for Hello World
Tackling Java 8, JDK 1.9 and Lambda
Installing JDK on Azure