An example of how to create and clone a GitLab repository

How can a developer clone a GitLab repository from the server to a local machine? GitLab repositories are packaged within GitLab projects, so before you can clone a GitLab repo, a GitLab project must exist first.
If you don’t already have one, it’s very easy to create a GitLab repository.
GitLab project repositories
The GitLab project and repository used in this example is name gitlab-made easy. It’s public and contains a README file.
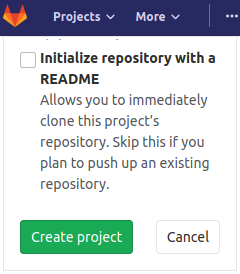
You can add a README when you create GitLab projects.
Developers don’t have to include a README when they create a GitLab repo. However, if a developer wants to clone a GitLab repository, they might want to have something in that repository to verify. Otherwise, if the GitLab repository you clone is empty, how can you tell if the GitLab clone was successful? That’s why I put a README file in this project and so should you.
After the project is created, the next step is to open an Ubuntu terminal window and issue the ‘git clone’ command. But first, you will need the URL of the repository. A developer can find the URL by clicking on the big blue clone button on the landing page for the repository in the Git GUI. Copy the HTTP URL and then open an Ubuntu terminal window.
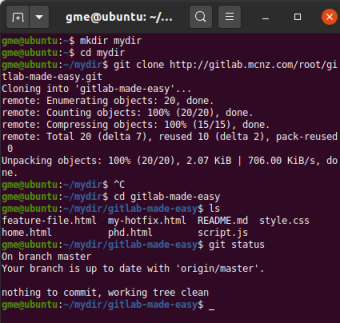
From the Ubuntu terminal, call the ‘git clone’ command and append the GitLab repository URL.
Clone a GitLab repository with Git
If ‘git clone’ doesn’t work, you might not have Git installed locally. Developers can solve that problem by issuing a ‘sudo apt-install git’ command. After the installation completes, simply re-issue the ‘git clone’ command to clone the GitLab repository.
gitlab@ubuntu:~$ git clone http://gitlab.mcnz.com/root/gitlab-made-easy.git
Cloning into 'gitlab-made-easy'...
remote: Enumerating objects: 20, done.
remote: Counting objects: 100% (20/20), done.
remote: Compressing objects: 100% (15/15), done.
remote: Total 20 (delta 7), reused 10 (delta 2), pack-reused 0
Unpacking objects: 100% (20/20), 2.07 KiB | 706.00 KiB/s, done.
Post GitLab clone tasks
After you successfully clone the GitLab repository, navigate into the newly created gitlab-made-easy folder. Inside you will see a README file, which verifies that the clone operation was successful.
Next steps would include creating new files in your Git working directory, adding those files to the index, issuing commits, creating GitLab branches and deleting those branches when they become stale. With the GitLab repository clone locally installed, the entire world of Git-based version control is now at your fingertips.
While we use an on-premises, self-hosted GitLab installation in this example, all the steps here apply equally to the cloud-based GitLab offering as well.
The source code and sample project used for these examples can be found on the gitlab-made-easy project page on GitLab.
 Cameron McKenzie is an AWS Certified AI Practitioner, Machine Learning Engineer, Solutions Architect and author of many popular books in the software development and Cloud Computing space. His growing YouTube channel training devs in Java, Spring, AI and ML has well over 30,000 subscribers.