How to install Jenkins on Windows

Windows Jenkins install
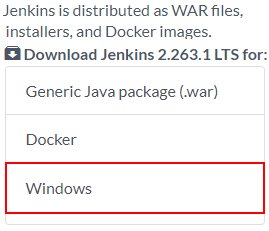
There are numerous ways to install Jenkins on Windows. Here are three options:
- Use a preconfigured Bitnami Jenkins image.
- Run the Jenkins war file from the command line.
- Download and run the Jenkins installer.
Preconfigured Jenkins images
The laziest approach is to simply install VMWare and run a Bitnami Jenkins image. It comes pre-configured with all of the Jenkins software already installed, so you pretty much just download the image and then it’s plug and play.
The Jenkins installer for Windows helps to simplify the install and config process.
Furthermore, if you like the preconfigured Jenkins image, you can bring it into the cloud — you can use the exact same VM to run Jenkins on AWS.
Install Jenkins via the WAR file
For more low-level control of Jenkins you can simply run the Jenkins WAR file at the command line. Download the Jenkins WAR file and issue the following command to run Jenkins from the command line:
java -jar jenkins.war
In fact, if your Windows machine already runs Tomcat, you could just drop the Jenkins WAR file in the webapps folder and Jenkins will install automatically. But there is an easier install option, so read on.
How to use the Jenkins Installer
By far the easiest way to perform a Jenkins installation on Windows, especially if you already have installed Java, is to use the Jenkins installer.
Compared to running the Jenkins WAR file or deploying Jenkins to Tomcat, there are definitely benefits to using the Jenkins installer, including the following:
- Easy-to-use installation wizard.
- Jenkins registration with Windows services.
- An uninstaller in Windows Programs Management.
Jenkins Home on Windows
One annoyance with the Jenkins installer is that is buries the Jenkins Home location under the Windows root. When you run the Jenkins WAR, it’s normally found in a folder named .jenkins under the user’s home directory:
C:\Windows\System32\config\systemprofile\AppData\Local\Jenkins\.jenkins
My assumption is that this Jenkins home location will work for all users, as opposed to putting it in a user’s home folder where other accounts can’t access it. Nevertheless, it is pretty deeply buried.
If you would like to set the home folder to somewhere more accessible, you can set the JENKINS_HOME environment variable after the Jenkins installer for Windows is finished.
Initial Jenkins Windows setup
After the Jenkins installer completes, there are still a few initial install steps to complete. You must provide the secret token hidden in the Jenkins home folder to prove you have access to the machine on which Jenkins was just installed. You’ll also need to select the Jenkins plugins you wish to install, and finally add an administrative user.
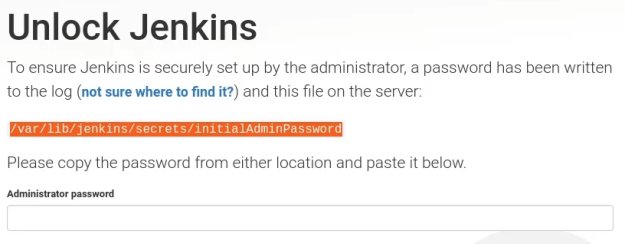
One of the configuration steps to perform after the Jenkins installer runs is to provide a hex key to prove your identity.
Once that’s done, you’re ready to create as many build jobs, shared Jenkins libraries and declarative pipelines as you like.

Cameron McKenzie is an AWS Certified AI Practitioner, Machine Learning Engineer, Solutions Architect and author of many popular books in the software development and Cloud Computing space. His growing YouTube channel training devs in Java, Spring, AI and ML has well over 30,000 subscribers.
Next Steps
The AWS Solutions Architect Book of Exam Questions by Cameron McKenzie
So what’s next? A great way to secure your employment or even open the door to new opportunities is to get certified. If you’re interested in AWS products, here are a few great resources to help you get Cloud Practitioner, Solution Architect, Machine Learning and DevOps certified from AWS:
- AWS Certified Cloud Practitioner Book of Exam Questions
- AWS Certified Developer Associate Book of Exam Questions
- AWS Certified AI Practitioner Book of Exam Questions & Answers
- AWS Certified Machine Learning Associate Book of Exam Questions
- AWS Certified DevOps Professional Book of Exam Questions
- AWS Certified Data Engineer Associate Book of Exam Questions
- AWS Certified Solutions Architect Associate Book of Exam Questions
Put your career on overdrive and get AWS certified today!