How to git push an existing project to Bitbucket

How to add a Git project to Bitbucket
To import an existing project into Bitbucket, follow these steps:
- Create a Bitbucket project into which you’ll import the existing project.
- Copy the Bitbucket project’s Git URL.
- Issue the
git initcommand in the root folder of your existing project. - Add all of your files to the Git repository and perform a commit.
- Add the Bitbucket repository as a remote reference for your local project.
- Run a
git pushoperation with your Bitbucket app password. - Confirm that all of the files from your existing project successfully pushed to Bitbucket.
Git remote add origin
This tutorial provides full details on how to push an existing project to Bitbucket. For those who just want the tl;dr version, here are all of the Git commands used in this example:
git initgit add .git commit -m "Add project to Bitbucket example"git remote add source https://[email protected]/cameronmcnz/example.gitgit push -u -f source master
Create the Bitbucket repository
To push an existing project to Bitbucket, you need a Bitbucket repository into which to push your project.
Log into your Bitbucket account and create a new Bitbucket repository.
Then, copy the Bitbucket’s Git URL, as you will need it when you perform the git remote add operation later.
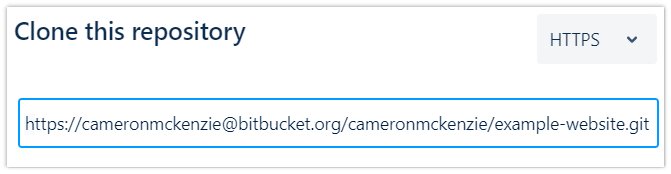
You will need the Bitbucket Git URL to push your existing project to the Atlassian server.
Initialize Git in the existing project
You must initialize the local project you want to push to Bitbucket as a Git repository.
If the existing project has a hidden .git folder in the project’s root directory, then it has already been initialized as a Git project. If not, you must issue the git init command in the project’s root folder.
git init
After the repository is initialized, add all of the project’s files to the Git index and perform a commit:
git add .
git commit -m "Add files to git before the Bitbucket push."
Possible git errors and roadblocks
You may run into issues as you perform the git init and git commit commands in this Bitbucket push example. Common problems users run into at this stage are:
- You may not have Git installed. If not, download it and install Git.
- You have not provided Git with your username and email
If the git commit fails due to the lack of a username and email, just issue these two commands:
git config --global user.email "[email protected]"
git config --global user.name "Bitbucket Expert"
After these commands complete, issue the git commit operation again.
Add the Bitbucket remote reference
To push and pull back and forth between your existing project and Bitbucket, add a remote reference in your local Git repository that points to your Bitbucket project.
Issue the following command, using the Bitbucket URL you copied to your clipboard in an earlier step:
git remote add source https://[email protected]/cameronmcnz/example.git
Upload your project to Bitbucket
Once you’ve added the remote reference added, push your existing project to Bitbucket with the following command:
git push -u -f bitbucket master
The existing project’s push to Bitbucket will require you to provide your username and your Bitbucket app password in the password field. If you do not have a Bitbucket app password, you must create one.
Note that this example attempts to push the master branch. Newer Git repositories have a main branch, not a master branch.
You must specify the branch name that that your existing Git project uses, when you perform the initial push to Bitbucket.
git push -u -f bitbucket main
View the existing project imported into Bitbucket
After the git push to Bitbucket completes, log into your Atlassian account and view your Bitbucket repository.
All of the files from your existing project should be visible online. This proves that the git push of your existing project to Bitbucket was a complete success.
 Cameron McKenzie is an AWS Certified AI Practitioner, Machine Learning Engineer, Solutions Architect and author of many popular books in the software development and Cloud Computing space. His growing YouTube channel training devs in Java, Spring, AI and ML has well over 30,000 subscribers.